
It’s Thanksgiving week and I’ve been cooking and baking. (Ok, I know it was last week, but I’m just now finally getting this done!) It feels so refreshing to do these jobs in my new kitchen and I’m continually amazed at how quickly I’m able to get things cleaned up when I’m done.
One of the items I contributed to our Thanksgiving dinner was dinner rolls.
Earlier this week, my friend Eva posted a picture on FB of her cloverleaf dinner rolls and I immediately decided I would make them for our Thanksgiving as well.
I began looking for a white bread recipe since the only bread recipe I had ever really made was whole wheat, and I wanted the rolls to be nice and light. After finding recipes with milk and eggs (and knowing most people at our gathering were mostly vegan), I decided to just use my tried and true recipe with some simple adjustments.
In no time at all, I had things mixing up. It always amazes me how the “thought” of making bread takes so much more energy than just actually doing it!

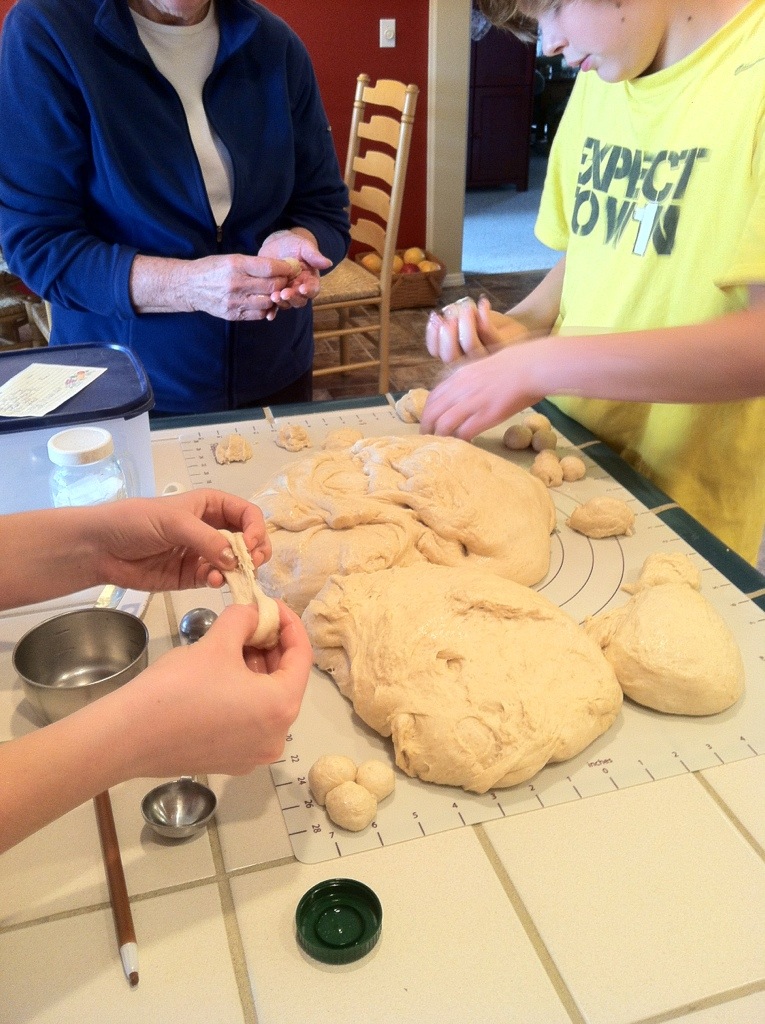
There were lots of willing hands to help.
Ok, mostly willing hands.
You’ll see in future posts that two sets of these hands went on to do other things that they found to be much more entertaining. More on that later.
It wasn’t long before everything was ready for the oven.

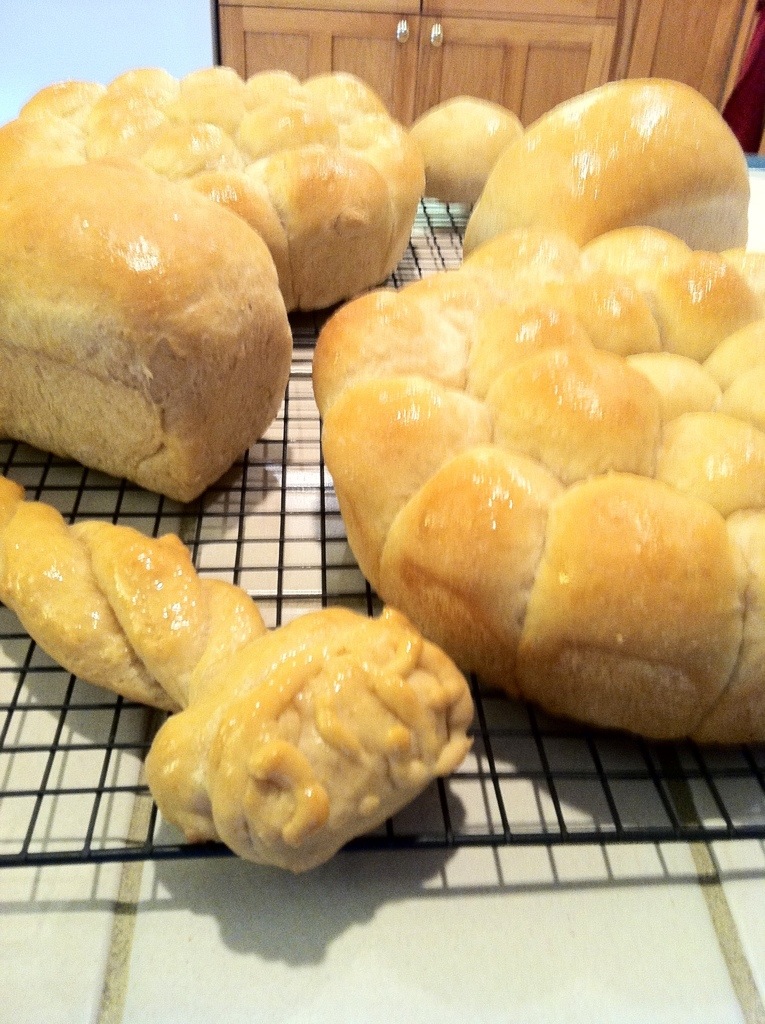
We made regular rolls in the round pans, a couple small loaves with what was left, and Kendrick made a little shape thingy there in the middle pan (more on that later too).

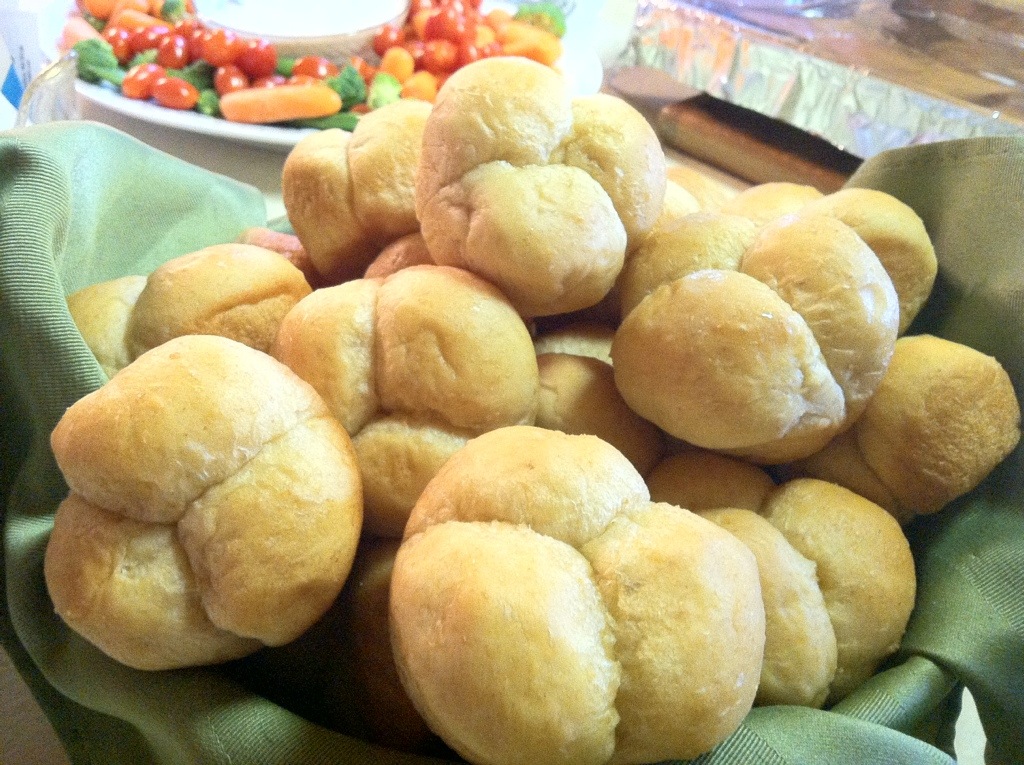
And these are the Cloverleaf Rolls. They were fun to make!
Everything came out of the oven a beautiful toasty brown. I brushed olive oil over everything when it came out of the oven. Mmmmmm, the house always smells so good when bread is baking!

This was how they were actually served, with my vegetable platter in the background. They were a huge hit, and I’m definitely going to make them again sometime!
A special Thank You to all my helpers! I couldn’t have done it without you all!

BREAD RECIPE
1/2 c. Oil
1/2 c. Honey
5-6 c. Warm Water (I always use 6 cups)
1/8 c. Dough Enhancer
1/4 c. Gluten Flour
1 1/2 T Salt
3 T Yeast
Enough flour so the dough doesn’t stick to the sides of the mixer
I have a Bosch mixer, which does all the kneading for me. Place the water, oil, and honey in the mixer. Add the Dough Enhancer, Gluten Flour, and Salt. Then add a couple cups of flour. Add the Yeast next. Mix slowly to get everything combined. Keep adding flour (I’m sorry, but I have no idea how many cups it takes). The dough will begin to pull away from the sides of the mixer. When the sides wipe clean, it’s enough flour. This takes some practice, and maybe in a future post, I’ll take a picture of what “clean sides” looks like!
I usually use mostly hard white wheat flour (that I grind myself). I mix in some white flour to give it a lightness, but the white wheat keeps whole wheat bread nice and light. I used to use Hard Red wheat, but never with these nice light results.
For these rolls, I used a few cups of the whole wheat, a couple cups of Bread Flour (yellow bag at the grocery stores), and the rest was white flour. I wanted them nice and light and “store-bought”ish! I love that there is freedom to add whatever type of flour you want. Sometimes I throw in some oats. But for this recipe, I used Hard White Wheat flour, White Flour, and Bread Flour.
Once there is enough flour, I let it mix (knead) for 15 minutes. After that, I turn it off and let it sit for about 10 minutes to rise a little bit. I then grease my hands and pull it out of the mixer onto my mat on the counter. Then comes the fun of forming the loaves, or rolls, or whatever you want to make out of your dough.
I let things rise again until about double in size and then put into the 350 degree oven and bake till nice and toasty brown. I don’t know how helpful this recipe will really be because I’m realizing that I just kind of wing it each time and don’t have any specific measurements or times for baking, but just kind of “know” what I’m looking for. I guess that would make me an experienced bread maker. Since I don’t consider myself to be a great cook, I’m happy to say that I DO know how to make bread.
Feel free to leave any questions in the comments section. It’s entirely possible that my recipe and directions could have something missing.
This is the actual recipe card that I use. It is bare bones basic!

Happy Bread Baking!
